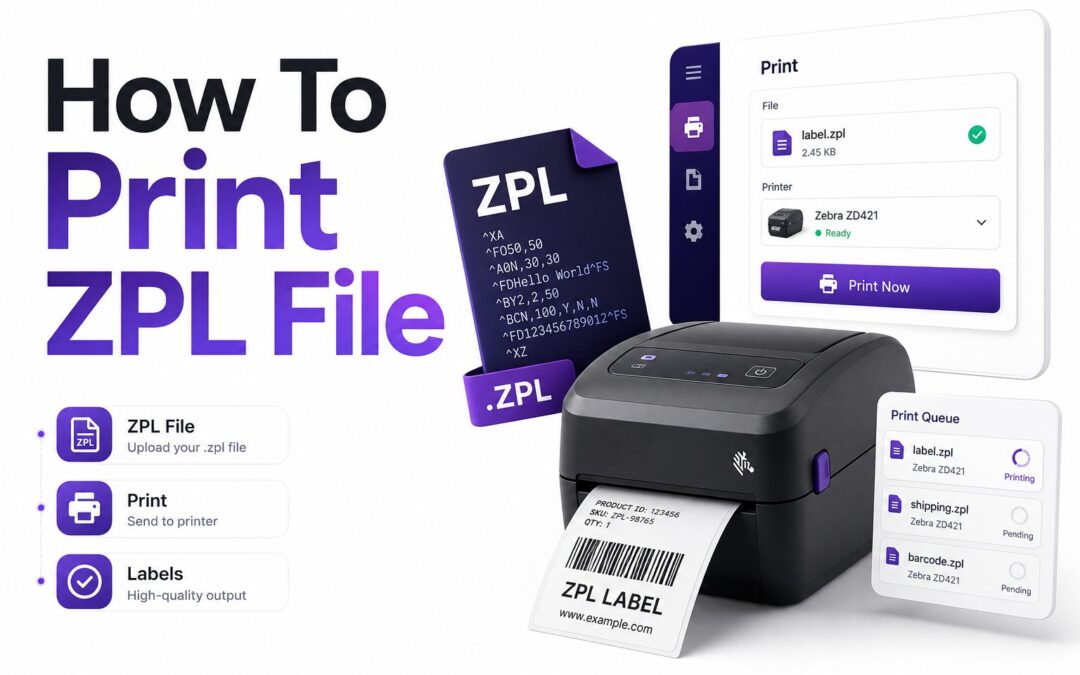
Printing a label should feel simple, but ZPL files can be confusing if you are seeing raw code instead of a finished barcode, shipping label, or product tag. ZPL, short for Zebra Programming Language, is designed for label printers, not regular office printers. That difference matters because the file contains printer commands rather than a visual document.
If you want to know how to print zpl file correctly, the main thing is sending the file directly to a compatible label printer without converting it like a PDF or Word document. Once the printer, driver, connection, and label size are set correctly, ZPL printing becomes fast, reliable, and easy to repeat across shipping, inventory, retail, healthcare, and manufacturing workflows.
What a ZPL File Is
A ZPL file is a plain-text instruction file used mainly by Zebra label printers and many compatible thermal printers. It tells the printer where to place text, barcodes, lines, images, and other label elements. The printer reads the commands and turns them into a physical label.
Unlike a PDF, a ZPL file is not meant to be opened and printed through a standard document viewer. If you open it in a text editor, you will see commands such as ^XA, ^FO, ^A, and ^XZ. Those commands are normal and should not be edited unless you know the label format.
Why ZPL Printing Works Differently
ZPL printing works by sending raw printer language directly to the printer. The file does not need a print preview or a page rendering engine because the printer itself interprets the layout. This makes ZPL fast, lightweight, and dependable for high-volume label printing.
Problems usually happen when a computer treats the ZPL file like a normal text document. In that case, the printer may print the commands instead of the label. The goal is to send the raw data stream directly to the label printer.
Key facts before printing
- ZPL files are plain-text printer command files.
- Zebra printers read ZPL natively.
- Many thermal printers support ZPL emulation.
- Regular inkjet and laser printers cannot print ZPL labels correctly.
- The file should be sent as raw data, not printed from a text editor.
- Label size, printer language, and connection settings affect the final output.
Check Your Printer Compatibility
Before sending a ZPL file, confirm that your printer supports ZPL or ZPL emulation. Zebra printers usually support it by default, but some models can switch between printer languages. If the printer is set to EPL, CPCL, or another mode, the label may not print as expected.
For non-Zebra thermal printers, check the manufacturer documentation for ZPL compatibility. Many shipping label printers advertise Zebra compatibility, but support can vary. Barcodes, fonts, darkness settings, and image handling may not behave exactly the same across different brands.
Choose the Right Connection Method
ZPL files can be printed through USB, network, Bluetooth, or serial connections, depending on the printer model. USB is common for desktop setups, while Ethernet or Wi-Fi is better for warehouses, shipping stations, and shared work areas.
Network printing is often the most flexible option because you can send ZPL files to the printer IP address from scripts, shipping software, or warehouse systems. USB is easier for a single workstation but may need driver configuration before raw printing works correctly.
Comparison of common printing methods
Method | Best for | Main advantage | Possible issue
USB connection | Single workstation | Easy physical setup | Driver may process the file incorrectly
Network IP printing | Shared printers and automation | Fast raw data transfer | Requires correct IP and port
Windows driver printing | Office-style workflows | Familiar printer selection | May print raw code if misconfigured
Command line printing | Developers and admins | Repeatable and scriptable | Needs exact printer path
Shipping platform export | Ecommerce and logistics | Convenient label generation | File size must match printer settings
How to Print ZPL File on Windows
On Windows, the easiest approach is often installing the correct Zebra printer driver, then using Zebra Setup Utilities or another raw printing method. Zebra Setup Utilities lets you send files directly to the printer without Windows trying to format them as text documents.
After installing the printer, open the utility, select the printer, and use the option to send a file or open communication with the printer. Choose your ZPL file and transmit it. If the printer is ready and the label size matches, it should print the formatted label.
Using Command Prompt on Windows
Windows can also send ZPL files from Command Prompt, especially for network printers. For a shared printer, commands such as copy can send the file to a printer share. For network printers, tools such as PowerShell or third-party raw print utilities may be more reliable.
The key is avoiding applications that modify the file. Do not open the ZPL file in Notepad and choose Print unless you specifically want to print the code. Send the file directly so the printer receives the ZPL commands unchanged.
Windows checklist
- Install the correct Zebra or compatible printer driver.
- Confirm the printer uses ZPL mode.
- Set the correct label width and height.
- Use Zebra Setup Utilities for direct file sending.
- Avoid printing ZPL through Notepad or Word.
- Test with one label before running a batch.
- Check darkness and speed settings after the first print.
How to Print ZPL File on Mac
On macOS, ZPL printing usually works best through raw network printing or terminal commands. Many Mac print dialogs are designed for documents, so they may not pass ZPL exactly as needed. A network-connected printer with a known IP address is often the cleanest setup.
You can use Terminal to send a ZPL file to a printer listening on port 9100. This approach sends the file directly to the printer socket. It is useful for developers, shipping teams, and anyone who needs repeatable label printing without extra software.
Mac Terminal Printing Basics
If your printer supports raw TCP printing, you can send the file using tools such as nc. The printer IP address must be reachable from your Mac. The ZPL file should already contain the correct label layout, barcode data, and print quantity.
For example, the command format is typically nc printer-ip 9100 < label.zpl. Replace the IP address and file name with your actual details. If nothing prints, check the network, printer port, firewall settings, and whether the printer is set to ZPL mode.
Tips for Mac users
- Use a network printer when possible.
- Confirm the printer IP address from its configuration label.
- Send ZPL through Terminal instead of the standard print dialog.
- Keep file names simple and avoid special characters.
- Test the same file on a known working printer if output looks wrong.
- Save common commands in a script for repeated use.
How to Print ZPL File on Linux
Linux is well suited for ZPL printing because it gives direct control over files, ports, and print queues. If the printer is connected over the network, raw socket printing is often the most direct method. For USB printers, the device path or CUPS configuration matters.
Many Linux users send ZPL with netcat, lp, lpr, or direct device writes. The best choice depends on how the printer is connected and whether CUPS is managing the printer. Raw printing should be enabled so the ZPL file is not filtered or converted.
Using CUPS and Raw Queues
CUPS can print ZPL files when the queue is configured to pass data through unchanged. A raw queue prevents CUPS from treating the file like a PDF, PostScript, or plain text page. This is important because any conversion can break the ZPL command stream.
Once the queue is configured, commands such as lp -d printer-name label.zpl can work cleanly. If the printer outputs code instead of labels, review the driver, queue type, and printer language settings. Raw output is the core requirement.
Benefits of raw ZPL printing
- Faster label output with less processing.
- Better compatibility with shipping and warehouse systems.
- Lower file size than image-based labels.
- Accurate barcode placement when label size is correct.
- Easier automation from scripts and backend applications.
- Less dependency on visual print drivers.
Printing ZPL from a Web Application
Web applications commonly generate or receive ZPL files for shipping labels, product labels, pallet tags, and order fulfillment. The browser alone cannot always send raw ZPL directly to a local printer because of security restrictions. A local print service or network print endpoint is usually needed.
Popular approaches include browser print helpers, local desktop agents, server-side print services, and direct network printing. The right setup depends on whether the printer is near the user, shared in a warehouse, or managed by a central system. For more setup detail, see our Zebra printer setup guide.
Using Middleware or Print Services
Middleware can receive ZPL from a web app and pass it to the printer without browser limitations. This is common in ecommerce operations where users click a button and labels print immediately at a packing station. It also helps standardize printer settings.
A local print agent can detect installed printers and handle raw data printing safely. Server-side printing is useful when printers are network-accessible from the backend. Each method should include error handling for offline printers, empty label rolls, and connection failures.
Common web printing options
Option | Use case | Notes
Local print agent | Browser-based shipping stations | Good for user-selected printers
Backend print service | Central warehouse systems | Best with static printer IPs
Direct socket printing | Controlled networks | Fast but needs network access
PDF conversion | Non-ZPL printers | Useful fallback, not true ZPL printing
Shipping platform integration | Ecommerce teams | Convenient when carrier labels are generated externally
Printing ZPL Files from Shipping Platforms
Shipping platforms often provide labels as ZPL, PDF, or PNG. Choose ZPL when you are using a compatible thermal label printer and want sharp barcodes with fast output. ZPL is especially useful for 4×6 shipping labels, inventory labels, and carrier-compliant formats.
Before printing, confirm that the label format selected in the platform matches your printer. A 4×6 ZPL label sent to a printer loaded with smaller stock can cut off addresses, barcodes, or tracking numbers. Printer calibration can also affect alignment.
Avoiding Carrier Label Problems
Carrier labels must remain readable and scannable. Do not resize ZPL labels through a document application. If the carrier generated the file for 4×6 labels, use 4×6 stock and keep the printer configured for that size.
If barcode scans fail, check print darkness, label quality, speed, and thermal head condition. A label can look acceptable to the eye but still fail scanner validation. Printing a test label and scanning it before processing orders can prevent costly shipping delays.
Practical carrier label tips
- Select ZPL as the output format only for compatible thermal printers.
- Match the printer stock to the label size in the shipping platform.
- Calibrate the printer after changing rolls.
- Keep the printhead clean for barcode clarity.
- Avoid scaling, screenshotting, or converting labels unnecessarily.
- Reprint damaged labels directly from the shipping platform.
Fixing Raw Code Printing
If your printer prints the ZPL commands instead of the label, the file is being treated as text. This is one of the most common problems. It usually means the printer does not support ZPL, is in the wrong language mode, or the operating system is processing the file incorrectly.
Start by confirming the printer model and language setting. Then send the file through a raw method such as Zebra Setup Utilities, netcat, a raw CUPS queue, or a direct socket connection. If the same file works on another printer, your setup is the likely issue.
Fixing Blank or Misaligned Labels
Blank labels can come from incorrect media type, darkness settings, thermal transfer ribbon issues, or a file that prints outside the label area. Misalignment often points to label size mismatch, lack of calibration, or incorrect origin coordinates inside the ZPL file.
Run printer calibration after changing label rolls. Check whether the printer is configured for gap, notch, or continuous media. If the label prints partially, compare the ZPL dimensions against the physical label size and printer resolution, usually 203, 300, or 600 dpi.
Troubleshooting checklist
- Printer outputs ZPL code: use raw printing and confirm ZPL mode.
- Nothing prints: check power, connection, IP address, and port 9100.
- Blank labels print: inspect media type, ribbon, darkness, and ZPL content.
- Label is cut off: verify label size and printer resolution.
- Barcode is blurry: reduce speed, raise darkness, and clean the printhead.
- Labels drift over time: recalibrate media sensors.
- Wrong printer prints: review the selected queue or printer share.
Editing and Previewing a ZPL File
A ZPL file can be edited in a plain-text editor, but small changes can affect layout. Common edits include changing text values, barcode data, label quantity, field positions, or font sizes. Keep a backup before editing production labels.
To preview a ZPL file, use a ZPL viewer or label design software that supports Zebra commands. Preview tools are helpful, but the final printer remains the best test because resolution, darkness, media, and firmware can change the physical result.
When to Use Label Design Software
Label design software is useful when you need repeatable templates for products, assets, patients, cartons, or compliance labels. Instead of manually writing commands, users can drag fields into place and export ZPL for printing or system integration.
Tools such as ZebraDesigner and other label design platforms can generate valid ZPL. This helps reduce syntax errors and speeds up template creation. For related workflow planning, see our barcode label printing best practices resource.
Safe editing tips
- Use a plain-text editor, not a rich text editor.
- Keep the original ZPL file unchanged.
- Change one field at a time and test after each edit.
- Avoid modifying printer setup commands unless required.
- Check barcode data carefully before production printing.
- Store approved templates in version control when possible.
Automating ZPL Printing
Automation is one of the biggest reasons businesses use ZPL. A warehouse system, ecommerce platform, ERP, or custom application can generate labels and send them directly to printers. This removes manual downloads and reduces mistakes during repetitive printing tasks.
Good automation includes printer mapping, error reporting, retry logic, and clear operator feedback. For example, a packing station may always send shipping labels to one printer and product labels to another. Clear routing prevents delays and incorrect labels.
Security and Access Control
Network printers should not be left open to every device without thought. If anyone can send raw commands to a label printer, they can waste labels, interrupt workflows, or print incorrect data. Use network rules, controlled applications, and limited access where possible.
For web-based systems, avoid exposing printer endpoints directly to the public internet. Use authenticated services, local agents, or backend-controlled print routes. Label printing feels simple, but it often contains customer addresses, tracking numbers, and internal product data.
Automation best practices
- Assign printers by workstation, task, or label type.
- Log print jobs for troubleshooting.
- Validate label data before sending it to the printer.
- Include retry handling for offline printers.
- Protect printer access on the network.
- Monitor media and ribbon status when supported.
- Test templates after printer firmware or driver updates.
Best File and Printer Settings
Good output starts with matching the ZPL file to the printer. Printer resolution affects coordinates and barcode size. A label designed for 203 dpi may not look right on a 300 dpi printer unless the template accounts for the difference.
Label width, length, media type, speed, darkness, and tear-off position also matter. These settings can be stored in the printer, sent through ZPL commands, or controlled by a driver. Keep settings consistent across printers that share the same label templates.
Testing Before Production
Always test a new ZPL file with a small batch. Print one or two labels, scan the barcode, confirm human-readable text, and check edges for clipping. This is faster than fixing dozens of bad labels after a production run.
For regulated or high-volume environments, create an approval process for label templates. Confirm barcode standards, required text, date formats, and product identifiers. A reliable test process protects both operational speed and data accuracy.
Pre-print checklist
- Printer supports ZPL or ZPL emulation.
- Correct label stock is loaded.
- Printer is calibrated.
- Resolution matches the ZPL template.
- Darkness and speed are suitable for the media.
- Barcode scans successfully.
- Text is not clipped or too small.
- Correct printer is selected for the job.
Conclusion
Printing ZPL files is straightforward once you treat them as printer command files rather than ordinary documents. The most important step is sending the file directly to a ZPL-compatible thermal printer through a raw printing method. Windows users can rely on Zebra Setup Utilities, while Mac and Linux users often get clean results through Terminal, raw sockets, or properly configured print queues.
The right setup also depends on label size, printer resolution, media calibration, connection type, and software workflow. If a label prints as code, comes out blank, or looks misaligned, the issue is usually in the printer language, raw data path, or media settings. Testing with one label before a full batch saves time and prevents scanning problems. With the right process, how to print zpl file becomes a repeatable task that fits smoothly into shipping, inventory, retail, and production workflows.
FAQ
Can I print a ZPL file on a normal printer?
No. A regular inkjet or laser printer cannot interpret ZPL commands correctly. You need a Zebra printer or a compatible thermal label printer that supports ZPL or ZPL emulation.
Why does my printer print ZPL code instead of a label?
This happens when the file is printed as plain text instead of raw printer data. Send the file directly through a raw print method and confirm that the printer is set to ZPL mode.
Can I convert a ZPL file to PDF?
Yes, some tools can render ZPL as PDF for previewing or printing on non-ZPL printers. However, conversion may affect barcode quality, sizing, and label accuracy, so test before using it in production.
What port is used for network ZPL printing?
Most Zebra network printers accept raw print jobs on TCP port 9100. The printer must be reachable on the network, and firewalls or router rules must allow the connection.
How do I preview a ZPL file before printing?
Use a ZPL viewer, label design tool, or printer utility that can render Zebra commands. A preview helps catch layout issues, but a physical test print is still the most reliable check.